PHS Visual Art Department
  • Home
    • Desperate Times Call for Mark-Making Magic
    • Home Jan 2020-August 2020
    • Home Fall 2019 - Feb 18, 2020
    • Home Archive 2018-March 2019
    • Home Archive Summer 2018-First Semester 2019
    • Home Archive Spring Summer 2018
    • Home-Archive January - May 2018
    • Home-Archive First Semester 2017-18
    • Home-Archive May-August 2017
    • Home-Archive Term 4 2017
    • Home-Archive Term 4 2017
    • Home-Archive Term2/3 2016
    • Home-End of Year 2016
    • Home Archive Fall 2015- January 5, 2016
    • Home Archive December 2016
    • Home-Archive May-Aug 2016
    • Home-Archive April-May 16
    • HomeArchive- Winter - April 2016
    • Home-2016 Jan-Feb12 Archive
    • Home- Back to School September 2015
    • Home-Term 6 2015 Archive through August 10th
    • Home-Term 5 Archive Through Sprng Break 2015
    • Home-June 2014 Archive
    • Home-Term 4 Archive 2015
    • Home-Term 3 Archive 2014
    • Home-Term Two Archive 2014
    • Home-Term One 2014 Archive
    • Home-Aug to September 2014 Archive
    • Home-March 2014 Archive
    • Home-February 2014
    • Home January 2014 Archive
  • Blog
  • Standards Based Grading
    • Home Archive-Sept-December 2013
  • Syllabus
  • Classes
    • Introduction to Art >
      • Introduction to Art Assignments
      • Art Fundamentals >
        • Art Fundamentals Assignments >
          • Unit One: Line
          • Unit Two: Positive and Negative Space
          • Unit Three: Color
          • Unit Four: 3 Dimensional Design-Creature Feature
          • AF- Color and Its Meaning
          • Unit Five: Digital Self-Portrait
          • Sumopaint Digital Self Portrait Assignment
          • Unit Six: Clay Vessel
          • Unit Seven: Cartooning
          • Unit Eight: Reduction Printmaking
          • Art Fundamentals Exam Details
    • Introduction to Digital Media >
      • Introduction to Digital Media Assignments >
        • Introduction to Digital Media CH 5 >
          • Introduction to Digital Media CH 5 Part 2
          • Introduction to Digital Media- Inches to Pixels File Size
          • Introduction to Digital Media CH 6 Presentation
        • Archive Fall 2016 Introduction to Digital Media Assignments
    • Animation-Experimental Video >
      • Animation-Exp Video Assignments
    • Graphic Design >
      • Graphic Design Assignments
      • Archive Fall 2015-Graphic Design Assignments >
        • Graphic Design Assignments-Archive 2014
    • Digital Photography 1 >
      • Portrait Research
      • Portrait of A Place Boot Camp
      • Digital Photography 1 Assignments >
        • Archive Digital Photography 1 Assignments
    • Digital Photography 2 >
      • Digital Photography 2 Assignments >
        • Modern Masters Research
        • Digital Photography 2 Light Painters
        • Now You See Me Now You Don't
    • Digital Illustration
    • Drawing 1 >
      • Drawing 1 Assignments >
        • Drawing 1 Assignments Archive Fall 16/17
        • 1st Semester 2015-16-Drawing 1 Assignments
    • Painting 1 >
      • Painting 1 Assignments
    • Drawing 2 / Painting 2 >
      • Drawing 2-Painting 2 Assignments
      • Drawing 2/ Painting 2 Alt Media Fiber Arts
      • Drawing 2/ Painting 2 Alt Media Encaustic
      • Drawing 2/ Painting 2 Collage
      • Drawing 2/ Painting 2 Alt Media Alternative Mark-Making-Invented Tool
      • Drawing 2-Painting 2-Alt Media-Printmaking
      • Archive 2015-16 Drawing 2/ Painting 2 Assignments >
        • Drawing 2/ Painting 2 Assignments 2014
    • Sculpture 1 >
      • Sculpture 1 Assignments >
        • Clay Bust Sculpting Videos
        • Wheel Throwing
    • Sculpture 2 >
      • Sculpture 2 Assignments
    • AP Studio Art >
      • AP Studio Art Assignments >
        • AP Studio Art Assignments First Semester 2016
        • AP Art Alternative Media
    • Art History >
      • Art History Assignments
    • AP Art History >
      • Art History Assignments Archive 15/16
      • The 250 >
        • CA1: Global Prehistory
        • CA2: Ancient Mediterranean
        • CA3: Early Europe and Colonial Americas
        • CA4: Later Europe and Americas
        • CA5: Indigenous Americas
        • CA6: Africa
        • CA7: West and Central Asia
        • CA8: South, East, and Southeast Asia
        • CA9: The Pacific
        • CA10: Global Contemporary
      • AP Art History Exam
  • Calendar
  • Art Club
    • Art Club Archive 2019-20
    • Art Club Archive 2016-17
    • Archive 2016 Art Club >
      • Home-Archive Term 5 2017
      • Art Club Day of the Dead
      • Art Club Archive of 2014-15
      • Art Club archive 2013-14
  • Travel to Italy
  • Wikis
    • Digital Photography Wiki Home
  • College & Career
    • Art College and Career Info
    • Pre College and Summer Art Camp
    • Scholarships
  • Inspirations
  • Advocacy
  • Teacher Resources
  • Wiki-Composition and Focus
  • Virtual and Online Learning Resources
  • A Day in Your Life: Quarantine Realities

Open Studio and Mac Lab Hours for End of Semester

​Week of January 9--13, 2017: Tuesday, Wednesday, …………….………….. 2:45-4:00
Week of January 16-20, 2017:  Monday, Tuesday Wednesday, Thursday…………2:45 – 4:00
All work must be done prior to the start of exams.

Week of January 16 - 20

Learning Target: Create an original book cover design that illustrates your knowledge of page layout, typography and photography.  Utilize your own original photography or art work in the design of the cover. Present and Respond to student art work through verbal and written critique process.  Research and Create an Infographic for Final Exam

Tuesday 1/17:  Last day to turn in any late, missing or incomplete work is Friday January 13th.
Work on Infographics Unit and Exam Paper.
Wiki Research on Infographics
Infographics Final Exam Page

INFOGRAPHIC due on the Exam Day!!!
Final Exam Infographics Unit
Final Exam Artist Statement
Elements and Principles of Design/Art

Week of January 9 - 13

Learning Target: Create an original book cover design that illustrates your knowledge of page layout, typography and photography.  Utilize your own original photography or art work in the design of the cover. Present and Respond to student art work through verbal and written critique process.  Research and Create an Infographic for Final Exam

Monday:  Last in class day to complete Book Design due Wednesday for Critique.  

Wednesday:  Book Cover Design Due for Critique,
Peer Critique:  You will be critiquing one person's book design, not a whole class critique.  Check to see who you've been assigned to.  Do the following for Critique today.  This will be part of your grade for RS 3 Presenting and Responding to Art through critique.
  1. Look at their actual book cover first.  
  2. Then look at their digital file copy of the book design
  3. Read their artist statement to get the details on the artist's concept, composition and how they feel their design turned out. 
  4. Complete the peer assessment sheet (you will need to copy this to the Google folder for the class assignment so you can edit the form.) Name yours:  lastname-firstname-peercrit.doc
  5. In Google Folder you should now have 3 things with your name on it:  peer critique doc, your artist statement and your pdf copy of your design. 
  6. Critique Follow Up- Parent Communication Letter.  After critique complete parent communication email about critique.  See Google Doc for what to say. You will simply copy and paste the appropriate portion of the document.   Make sure you copy your teacher on this email.​
Begin work on Infographics Unit and Exam Paper.
Wiki Research on Infographics
Infographics Final Exam Page

Friday 1/13 and Tuesday 1/17:  Last day to turn in any late, missing or incomplete work is Friday January 13th.
Work on Infographics Unit and Exam Paper.
Wiki Research on Infographics
Infographics Final Exam Page

INFOGRAPHIC due on the Exam Day!!!
Final Exam Infographics Unit
Final Exam Artist Statement
Elements and Principles of Design/Art

Week of January 2 - 6

Learning Target: Create an original book cover design that illustrates your knowledge of page layout, typography and photography.  Utilize your own original photography or art work in the design of the cover. Research book covers including their design, the parts of the book and the way they are constructed. ​

Tuesday/Thursday:  Studio Work days to complete Book Cover designs featuring your own original art work/photography, complex typography and realistic book elements (ISBN code, author photo, synopsis of book etc)

Thursday:
Discussion of Final Exam expectations.  Infographics Unit and Exam Paper.
Wiki Research on Infographics
Infographics Final Exam Page

Final Critique of books on Wednesday January 11th Covers must be presented wrapped around the book.  
Book Design Unit Description
Final Exam Infographics Unit
Final Exam Artist Statement

Week of December 19 - 22

Learning Target: Create an original book cover design that illustrates your knowledge of page layout, typography and photography.  Utilize your own original photography or art work in the design of the cover. Research book covers including their design, the parts of the book and the way they are constructed. 

Monday:  Visual Journal and wiki due for Book Research.  
  • Get started on your designs.  
  • Make sure you have a physical copy of your book 
  • Start making the artwork you will use (photos or illustrations)

Wednesday:  Demonstration on Setting up Book Designs in Illustrator or InDesign.
  • have art work ready for cover (photos or illustrations)
  • Set up layout that is the correct size for the actual book, but also fits the paper you've chosen
Critique of Final Book Covers is Monday, January 9th
Book Design Unit Description

Week of December 12 - 16

Learning Target: Create an original book cover design that illustrates your knowledge of page layout, typography and photography.  Utilize your own original photography or art work in the design of the cover. Research book covers including their design, the parts of the book and the way they are constructed. 

Tuesday 12/13: Introduction to New Project Book Design
  • Presentation on Book Design
  • Begin wiki research and choose a book to design a cover for, make sure you've read it!
  • Plan photograph(s) that will be included in design.
  • Develop thumbnails and other visual journal research to plan your designs.  Thumbnails should show images and layout designs you are considering including the front, back cover, spine and flaps of the cover.
  • Write a brief 3-5 sentence synopsis of your book's plot and explain how that will influence the design you have planned, including the photo or artwork you will include.  
  • See image below.
​ 
Thursday 12/15:  Continue working on research using wiki and visual journals to plan book cover design.  
Picture
Book Design Unit Description

Week of December 5 - 9

Learning Targets: Connect to historic designers and the art of logo design as the starting point for our Corporate Identity unit.  Create logos and other corporate identity materials for your chosen company.  

Tuesday:  Final work day to finish Corporate Identity

Learning Targets:  Present and Respond to final artwork through written and verbal critique process.
​

​Thursday:  Critique of Corporate Identity
  • All works matted and ready for display and presentation.  Make sure you have a 3D product design as well as your board. 
  • Create a folder in the Corporate Identity Folder on Google Drive.  Inside the folder put the following Illustrator digital files:
    • 8.5 x 11 Business Cards 
    • 8.5 x 11 Envelop document
    • 8.5 x 11 Letterhead document
    • 8.5 x 11 logo (original you created to copy from
    • Digital File you created for your product design.  
  • 1 artist statement saved to Google Drive folder analyzing the corporate identity series you've created.  
    • Make sure you explain the elements and principles you used
    • the type of logo you created 
    • the type of balance you used.  
    • Explain why you feel your design would be a good choice for the company.  
    • How you used the 3 Cs and met criteria of the assignment
    • Anything you would change about your project
  • Critique Follow Up- Parent Communication Letter.  After critique complete parent communication email about critique.  See Google Doc for what to say. You will simply copy and paste the appropriate portion of the document.   Make sure you copy your teacher on this email.​

Week of November 28 - December 2

Learning Targets: Connect to historic designers and the art of logo design as the starting point for our Corporate Identity unit.  Research logos to learn more about their significance.  Research companies and create an identity plan for your chosen company.  Create logos and other corporate identity materials for this company.  

Monday- Friday:  Continue work on designs for Corporate Identity.

Remember you need the following:

Business Card 
Envelop
Letterhead
Product (3-d object with design on it)


 Due for critique Thursday December 8th ​
Corporate Identity Description

Week of November 14 - 22

Learning Targets: Connect to historic designers and the art of logo design as the starting point for our Corporate Identity unit.  Research logos to learn more about their significance.  Research companies and create an identity plan for your chosen company.  Create logos and other corporate identity materials for this company.  

Tuesday 11/15:  Visual Journal pages including thumbnails of logo and corporate identity are due.  Complete a sketchbook/wiki research rubric and meet with me to discuss your plan.  Start creating the digital version of your logo design in Illustrator.  

Thursday 11/17:  Demonstration of Illustrator set up for Business Card, Envelop and letterhead.  Get started on designing these.  

Monday 11/21:  Continue work on designs for Corporate Identity.  Due for critique Friday December 2nd 
Corporate Identity Description

Week of November 7 - 11

Monday 11/7
Learning Targets: Connect to historic designers and the art of logo design as the starting point for our Corporate Identity unit.  Research logos to learn more about their significance.  Research companies and create an identity plan for your chosen company.  Create logos and other corporate identity materials for this company.  

Intro to new unit on Corporate ID-Logo Design. 
Start Wiki research page. This is just step one to understand logos and how important they are to a corporation's identity.  

After you finish the wiki
Begin to consider what company you will create a design for.  This will be your own new interpretation of the company, the products it sells and it's services.  Use what you discovered about typography from the last unit to develop an idea.  You will create an identity package that includes:
  • a logo that is incorporated into
  • business envelop design
  • business card design
  • business letterhead design
  • product design related to the business (could be a mug, tee shirt, box, can, skateboard etc.  depends on the business you select)
  1. ​Develop 2 pages of Visual Journal research about your company including written and designed information that will help you plan this project. Your research pages should answer the following questions in images and words. 
    1. Who is this company,
    2. What kind of product or service do they provide?
    3. Who are their clients? age? type of people?
    4. What kind of budget do they have?
    5. Are they well established or newer?
    6. What is the vibe of this company? (trendy, romantic, classy, old school, up and coming, artistic, technical)
  2. Develop 2-4  pages of thumbnails that plan the logo design (at least 6 different ideas) and the look of the items listed above (2-3 thumbnails each showing the layout of the business card, letterhead, envelop and the product design)
Wednesday 11/9:  Work day to complete wiki research and thumbnail designs of logo and stationary and product design.  

Friday 11/11:  Final day to complete full color thumbnails, log designs, stationary and product design.  All wiki research should be completed as well.  
​Fill out Wiki/Thumbnail rubric for meetings on Tuesday with Mrs. Bjork.  
Corporate Identity Description

Week of October 31 - November 4

Learning Targets:  Present and Respond to final artwork through written and verbal critique process.

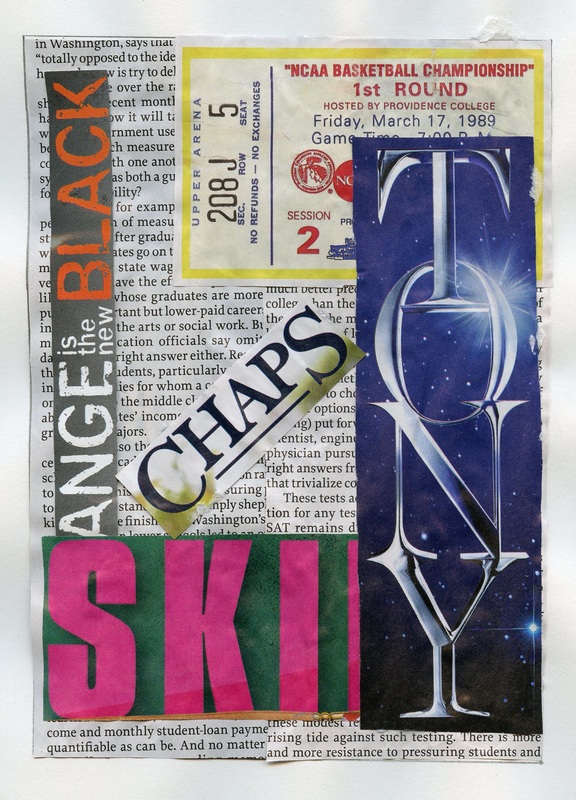
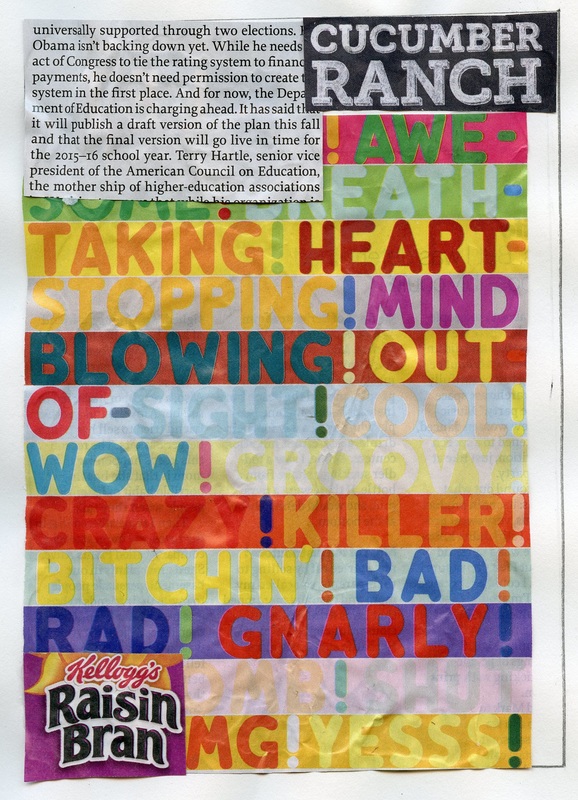
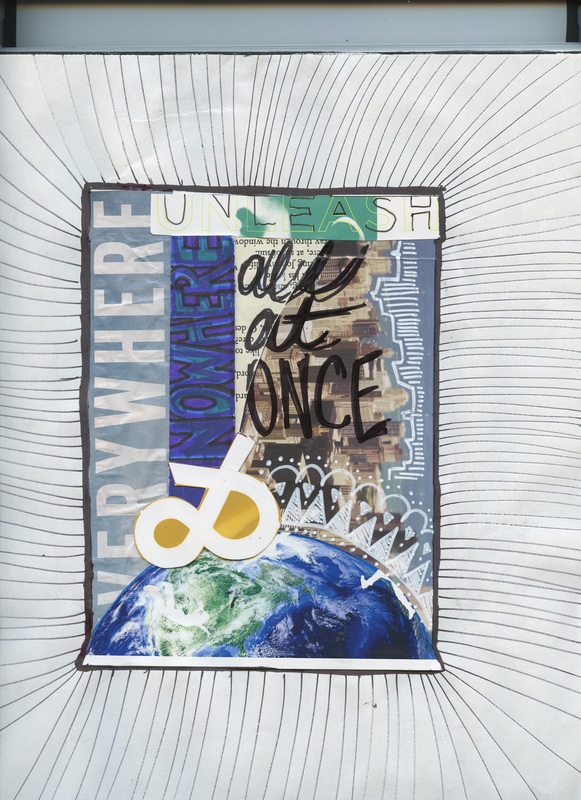
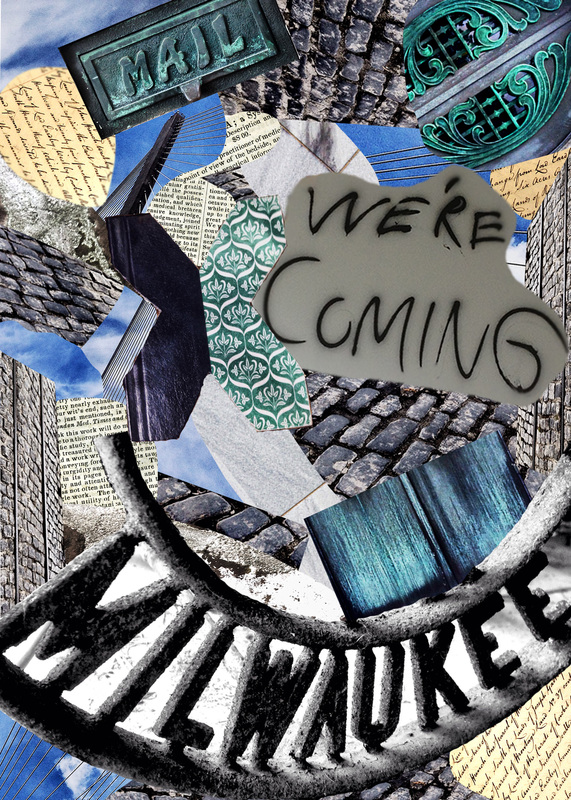
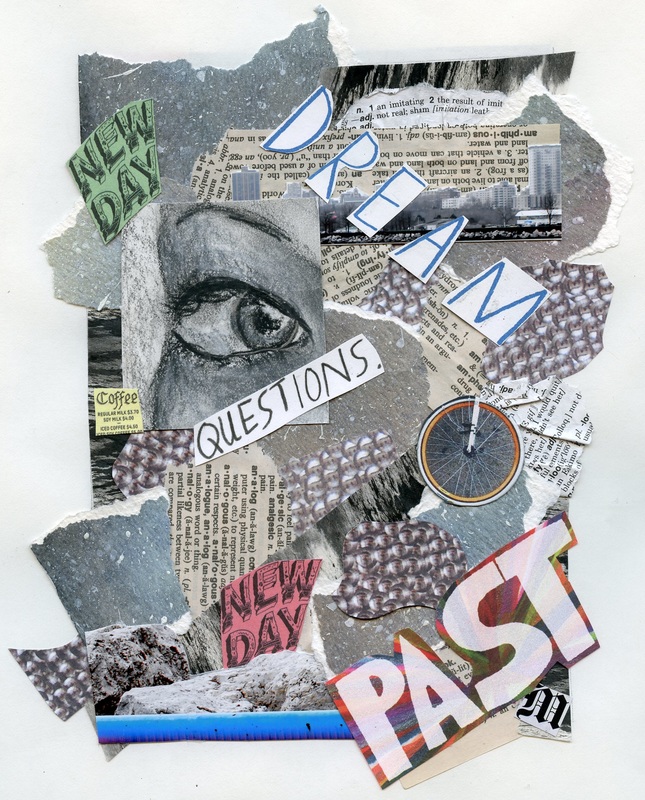
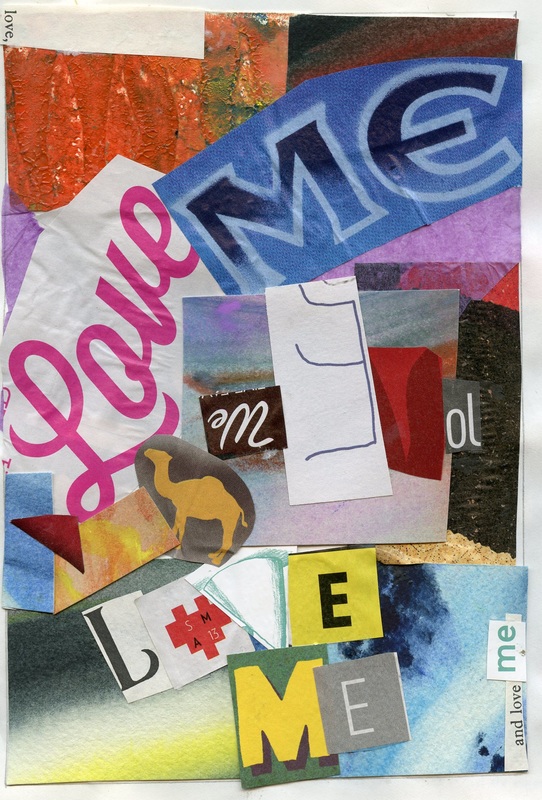
Tuesday: Final Work day to finish collages for critique on Thursday.  

Thursday
Critique of 3 best collages from Found Typography and Artist Collage Unit. Please have the following ready for critique: 
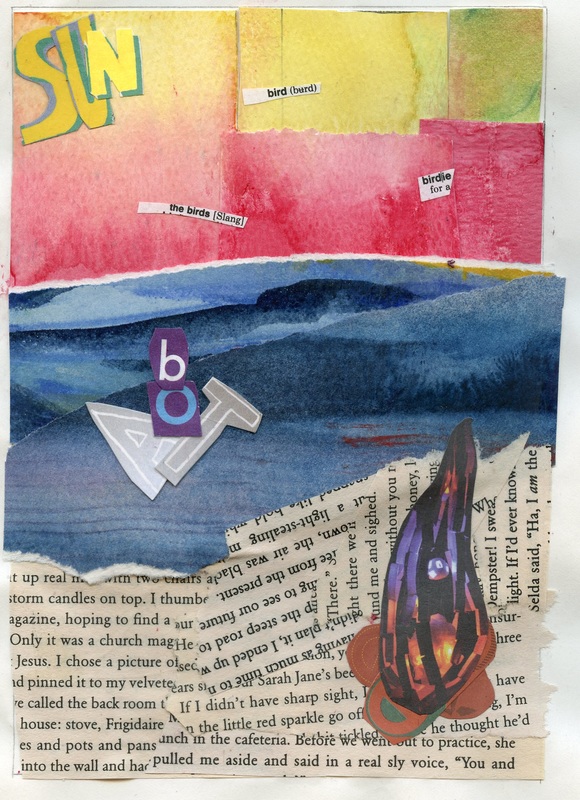
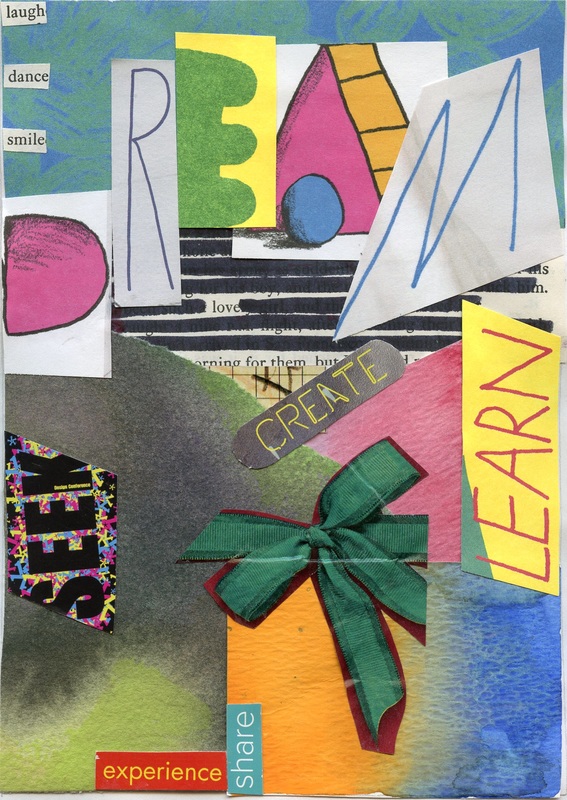
  • 6 scanned collages saved to Google Drive folder and named properly (see last week for details)
  • 3 best collages from the collection matted and finished off for critique (matted separately not together) Use your choice of poster board color.  2-3 inch border for each.  
  • 1 artist statement saved to Google Drive folder analyzing the 3 best collages you've chosen to mat for critique
  • Critique Follow Up- Parent Communication Letter.  After critique complete parent communication email about critique.  See Google Doc for what to say. You will simply copy and paste the appropriate portion of the document.   Make sure you copy your teacher on this email.​

Week of October 24 - 28

Learning Target:  Connect to graphic design history and the rich and varied typographic artists therein. Create found typography collages that utilize type as the main design element.  Respond and present research via wiki publication.

Monday:  Intro to Illustrator and how to create found typography collage.  Disucss vector art vs raster art. When to use Photoshop vs Illustrator

Finish with Found Typography collages. 
 By the end of today's class you should have the following finished:
  • 3 collages about your 3 collage artists done in their style and including their name, other facts about them
By the end of today's class you should have the following started and at least 1 collage complete. 
  • 3 collages utilizing found typography, 1 must be digitally created, one must be hands on, the third is your choice. 
Wednesday:  Continue creating digital collage with Illustrator  Save an Illlustrator version and also a jpg version of your collage when finished. 

When collages are complete scan all 6 of them and post in the share drive for our class.  Make sure you name the collages as follows: 
lastname-firstname-artistcollage1.jpg, lastname-firstname-artistcollage2..jpg, lastname-firstname-artistcollage3..jpg
lastname-firstname-foundtype1.jpg, lastname-firstname-foundtype2.jpg , lastname-firstname-foundtype3.jpg 

Friday:  Finish collages, mat the best 3 of your 6 collages (at least one from each collection).  Complete an artist statement and Art Project rubric.  Critique will be Tuesday November 1st. 

Week of October 17 - 21

Learning Target:  Connect to graphic design history and the rich and varied typographic artists therein. Respond and present research via wiki publication.

Tuesday:  Finish with Found Typography collages.  By the end of today's class you should have the following finished:
  • 3 collages about your 3 collage artists done in their style and including their name, other facts about them
By the end of today's class you should have the following started and at least 1 collage complete. 
  • 3 collages utilizing found typography, 1 must be digitally created, one must be hands on, the third is your choice. 
Thursday:  No School
Unit 2 Found Typography

Week of October 10 - 14

Learning Target:  Connect to graphic design history and the rich and varied typographic artists therein. Respond and present research via wiki publication.

Monday 10/10:  Studio work time to develop 3 pages in your Visual Journal/Sketchbook about your  Collage artist research. See last Thursday's lesson for details.

If you finish these designs you can go onto the Found Typography part of this assignment.  

Found Typography collages. 
  1. Go on a scavenger hunt in the classroom, around the school, in your home, out and about in the community! Collect actual objects that are typographic.  Bring them in for this project. (cut them out etc). If you can’t bring the physical type in; shoot photos of type you find.  You can have some of both (actual and photos). Make sure the photos are well lit and edited to just the type you’ve found.  This hunt should include examples of actual letters and objects that appear to be letters, but aren’t (T-square example).  Create 3 small collages (5” x 7”) in your sketchbook.  At least one should be a digital collage and the other should be a hand made cut and paste collage.  The third one can be either choice.  Remember all the things we’ve discussed about composition and truly design the collages so they are beautiful in terms of layout and composition, concept and craftsmanship.  See my pinterest board on Collage for ideas.  Check out my pinboard on Collage.
  2. Mrs. Bjork's Pinboard on Found Typography
Wednesday/Friday:  Studio Work days to complete Found Typography Collages. 
Unit 2 Found Typography

Week of October 3 - 7

Introduction to Typography 
Learning Target:  Connect to graphic design history and the rich and varied typographic artists therein. Respond and present research via wiki publication.

Tuesday 10/4:  Finish Wiki research on Typography
Research new unit on Typography using wiki.  There are multiple parts to the new unit.  See the details in the assignment description here.  
​
Part 1 will begin today with wiki research.  
  • Read the page on Typography first.  Make sure you click on all the links and watch all the embedded videos.  
  • Once you've read this page you will do your assignment on this wiki page.  
  • Mrs. Bjork's Pinboard on Typography
  • Mrs. Bjork's Pinboard on Found Typography

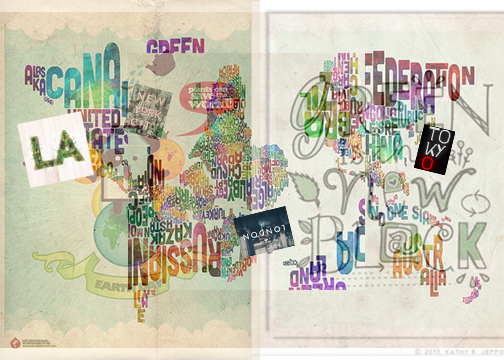
Thursday 10/6: Collage How To: Today we will learn some collage techniques.  Your goal will be to do part 2 of this assignment, which is to create 3 small collages in your sketchbook.  See the assignment sheet for details.  
You will also do a bit of research so you know how to do collage: Look at artists who use collage as part of their way of making art.  Click this wiki link for collage info

Design 3 pages in your Visual Journal to reflect your research.

​Choose 3 artists from the list I've provided.  In your sketchbook list each of the 3 artists and design a visual journal page about them. 
Explaining the following:  
  • How does each artist use collage?
  • What types of collage do they create (photographic, fabric, found objects)
  • How do they use typography in their collages?
Check out my pinboard on Collage. 
Check out my pinboard on Visual Journals if you're not sure what I mean by this term.  
Unit 2 Found Typography

Examples of Visual Journal Collage Artist Research

Week of September 26 - 30

Learning Targets: Present and Respond to student art designs via the written and verbal critique process. Research and Plan ideas for typography assignment using wiki and sketchbook to develop ideas. 

Monday 9/26:  Work day to prepare shape designs for critique next class.  Be sure you have all of the following prepared for critique.  

Wednesday 9/28: Critique of Shape Project.  Make sure all of the following items are completed:
  • Written artist statement saved into class Google Folder and named last name-first name-shape.doc
  • Finished shape designs (printed and cut paper) mounted on black or white poster board with appropriate visual space and name designed in an interesting way with title (not shape).
  • Digital copy of digital shape design in Google foldersaved as a jpg and named: last name-firstname-shape.jpg
  • Digital photo of your cut paper design turned into Google Folder, well photographed with good lighting, no background clutter and cropped to show work only, in focus named: last name-firstname-cut shape.jpg
​
Friday 9/30:
Critique Follow Up-  Follow up to Critique Parent Communication Letter.  
  1. After critique complete parent communication email about critique.  See Google Doc for what to say. You will simply copy and paste the appropriate portion of the document.   Make sure you copy your teacher on this email.​
Introduction to Typography 
Learning Target:  Connect to graphic design history and the rich and varied typographic artists therein. Respond and present research via wiki publication.

Research new unit on Typography using wiki.  There are multiple parts to the new unit.  See the details in the assignment description here.  
​
Part 1 will begin today with wiki research.  
  • Read the page on Typography first.  Make sure you click on all the links and watch all the embedded videos.  
  • Once you've read this page you will do your assignment on this wiki page.  
  • Mrs. Bjork's Pinboard on Typography
  • Mrs. Bjork's Pinboard on Found Typography

Week of September 19 -23

Learning Targets:
Create a unique abstract design using 1 shape and 3 colors to illustrate one of the three types of balance. Create a digital version of the design concept using images to create the shapes. Connect to Art historical designs that relate to shape and color. 

Tuesday: Introduction to Photoshop.  
  • How to use the selection tools and shape tools 
  • How to edit color
  • How to copy and repeat 
  • How to scale and rotate
Begin your digital version of your design.  You will need to mathematically scale your 12 x 18 inch cut paper design for the digital version, which will be 6 x 9

Photoshop Document size should be 300 dpi and 6" x 9"

Thursday:  Work day to finish cut paper and digital designs.  Demo on how to print if you're ready for that. 
Prepare the following for critique:
  1. Written artist statement saved into class Google Folder and named last name-first name-shape.doc
  2. Finished shape designs (printed and cut paper) mounted on black or white poster board with appropriate visual space and name designed in an interesting way with title (not shape).
  3. Digital copy of digital shape design in Google folder saved as a jpg and named: last name-firstname-shape.jpg
  4. Digital photo of your cut paper design turned into Google Folder, well photographed with good lighting, no background clutter and cropped to show work only, in focus named: last name-firstname-cut shape.jpg

Critique next week Wednesday, September 28th

Week of September 12 - 16

Learning Targets:
Create a unique abstract design using 1 shape and 3 colors to illustrate one of the three types of balance. Create a digital version of the design concept using images to create the shapes. Connect to Art historical designs that relate to shape and color. 

Monday & Wednesday: 
Wiki research should be finished from last class.
  • Develop thumbnails for the Shape Assignment.
  • Divide 2 pages into six 2” x 3” boxes.  (Twelve boxes total) Be neat and organized with the division of your page.  (You could create the boxes on the computer, print out and then draw on them.) 
  • Develop 12 full color thumbnails for your design idea playing around with color schemes and designs as you work. 
  • Be sure to try all of the balance types (2- 3 of each type at least) 
Thumbnails in full color due at end of class.  See assignment sheet below for details.
  • Meet with me to share your designs and wiki research.
  • Complete a Wiki-Thumbnails Rubric.  Fill this out with the wiki research and sketches in mind. 
  • Get started on paper version of your design using construction paper.
Friday: 
  • Continue developing your cut paper version of your shape design.
  • Digitally start looking for images you want to use that are the colors you need.  Doesn't matter what's in the image. 
  • Save these into a folder called Shape on your Pictures directory. ​
Unit 1 Shape Description

Week of September 6-9

Abstract Shape Unit

Learning Targets:
Create a unique abstract design using 1 shape and 3 colors to illustrate one of the three types of balance. Create a digital version of the design concept using images to create the shapes. Connect to Art historical designs that relate to shape and color. 

September 6
Research Abstract shape designs via the class WIKI   Find images on the Internet that use only shape and color as the elements of the design. Look for one example of asymmetrical, symmetrical, and radial, three total examples and post them to the WIKI.  Then explain what you liked about the image you found and how it illustrates each type of balance.
  • Develop thumbnails for the Shape Assignment.
  • Divide 2 pages into six 2” x 3” boxes.  (Twelve boxes total) Be neat and organized with the division of your page.  (You could create the boxes on the computer, print out and then draw on them.)
  • Develop 12 full color thumbnails for your design idea playing around with color schemes and designs as you work. 
  • Be sure to try all of the balance types (2- 3 of each type at least)

Wiki research due by the end of class. 
Thumbnails in full color due at end of next class.  See assignment sheet below for details.


September 8
Full color thumbnails are due at the end of class.  
  • Meet with me to share your designs and wiki research.
  • Complete a sketchbook rubric with your thumbnails.  Fill this out with the wiki research and sketches in mind. 
  • Get started on paper version of your design using construction paper.
  • Digitally start looking for images you want to use that are the colors you need.  Doesn't matter what's in the image. 
  • Save these into a folder called Shape on your directory. 

Getting Started Day 1

Learning Targets: Create and Explore our digital work environment setting up digital accounts. 
Research compositional visual journals and how they are used and designed.

​
Today we'll be getting to know the mac computer and setting up the various digital accounts we'll be using in the class.  Your goal is to set up the digital environment so you can be organized and easily find what is needed for the class.  You need to be sure you have saved your passwords in a safe place that you can access during class.

The mac log in is
username:  last name 4 first name 3 grad year
password:  your six digit student id


Choose which browser you prefer to use, Safari or Firefox or Chrome. You will need to bookmark the following websites for use during class.
1.   Class Wiki
2.  PHS Design Assignment Page (that's this one!)
3.  Flickr

After you've clicked the above links and bookmarked all, come back to the Class Wiki.  You will be logging in using the following join code. 

https://wikispaces.com/join/NDMPR3R
Wiki JOIN Code: NDMPR3R​

  1. Log into the Class Wiki
  2. Click on your username at the top of the wiki
  3. You will be taken to your dashboard, click the settings tab
  4. From the settings tab you can choose a new username, password and upload a profile image.  Set up your profile now and make sure you write down all the changes somewhere safe!!
  5. The mac computer has a camera on it.  Use PhotoBooth to take a picture of yourself to use as a profile picture.
Technology Usage Contract

Daily Class Supplies

For daily class you need
  1. your mac login
  2. a sketchbook to be used as your visual journal - It should have at least 50 pages and be book or spiral bound.  8.5" x 11" or 9" x 12" is a perfect size.
  3. number two pencil. 
  4. Suggested to also have a 2 gb or higher flash drive.

Visual Journals: What Are They? 

A visual journal is more than a sketchbook.  It is a place where you will track your creative process.  You will write, draw, collage, sew, glue, paint, think and plan in your visual journal.  It is the process of making your notes and ideas visual.  You will design your notes and ideas showing the process of how you arrive at your final work of art.  Being able to explain your though process through visual means is vital to literacy.  Leonardo da Vinci did this and so can you!  There are many great Visual Journal examples out in the world.  Check out some of these resources to see what Visual Journaling is and how you can make more of this process.  

Tim Needles Sharing Notebooks Post
Mrs. Bjork's Pinboard on Visual Journals
​Journal Fodder Junkies Website
Journal Fodder Junkies Blog
Lynda Barry's Syllabus

Assessment in Class

As always the artwork you create and the way you present it will influence the grades you receive in this class.  We are in our second year as a district using Standards Based Grading.  With each unit you will see a highly detailed form that describes the assignment and shows what Reportable Standards and Priority Standards are being covered in the unit.   As we've done in the past you will participate in the critique process, which involves presenting your finished artwork and evaluating it in verbal and written form. 
  •  You will use the following  rubrics to self assess your work. Each is standards based and will be used to determine your grade in this class.  In some classes you will complete these digitally, while in others you will fill out a paper copy.  
  • Each class will digitally turn in their artist statements and a copy of their digital work to the Google folder for the class.  
  • All work will be turned in digitally for this class.  Please see the Google Folder Links Embedded Below.
Art Project Rubric
WIKI-Thumbnails Rubric
Sketchbook Plan Rubric
B3 Google Class Folder

How to Print in the Mac Lab

Click the button here to help with how to print in the Mac Lab.  If you need additional help see your teacher.  
How to Print in Mac Lab

Inspiration: Check These Out!

What is Graphic Design?
Graphic Design Career Guide AIGA
Getting Started In Graphic Design
Communication Arts Magazine
HOW Design
Designer Daily
Good Logo
I.D. Magazine
EYE International 
Design Review
History of Graphic Design
Elements of Design
Principles of Design
Emigre Font and Design Site
Baseline Typography
Font Feed:Typography
Design Council UK

Pinboards on Design
Mrs. Bjork's Pinboard on Design & Illustration
Mrs. Bjork's Pinboard on Typography
Mrs. Bjork's Pinboard on The History of Graphic Design
Mrs. Bjork's Pinboard on Proportion
Mrs. Bjork's Pinboard on Graphic Resumes
Mrs. Bjork's Pinboard on Color Designs

The Elements and Principles of Design in Graphic Design
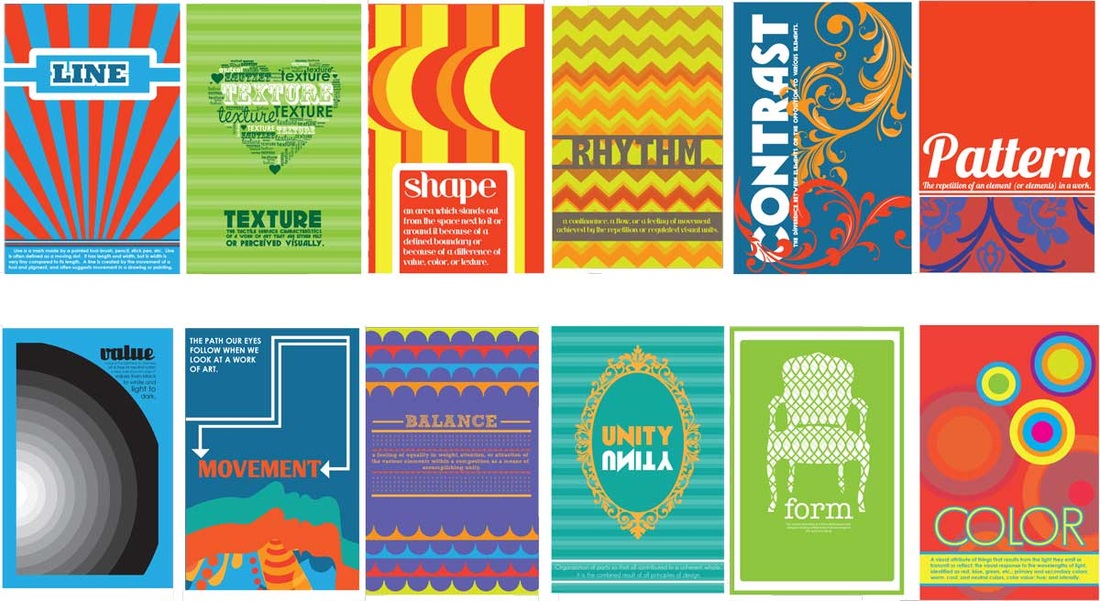
Picture
Powered by Create your own unique website with customizable templates.