PHS Visual Art Department
  • Home
    • Home Archive Fall 2020-March 21
    • Home Jan 2020-August 2020
    • Home Fall 2019 - Feb 18, 2020
    • Home Archive 2018-March 2019
    • Home Archive Summer 2018-First Semester 2019
    • Home Archive Spring Summer 2018
    • Home-Archive January - May 2018
    • Home-Archive First Semester 2017-18
    • Home-Archive May-August 2017
    • Home-Archive Term 4 2017
    • Home-Archive Term 4 2017
    • Home-Archive Term2/3 2016
    • Home-End of Year 2016
    • Home Archive Fall 2015- January 5, 2016
    • Home Archive December 2016
    • Home-Archive May-Aug 2016
    • Home-Archive April-May 16
    • HomeArchive- Winter - April 2016
    • Home-2016 Jan-Feb12 Archive
    • Home- Back to School September 2015
    • Home-Term 6 2015 Archive through August 10th
    • Home-Term 5 Archive Through Sprng Break 2015
    • Home-June 2014 Archive
    • Home-Term 4 Archive 2015
    • Home-Term 3 Archive 2014
    • Home-Term Two Archive 2014
    • Home-Term One 2014 Archive
    • Home-Aug to September 2014 Archive
    • Home-March 2014 Archive
    • Home-February 2014
    • Home January 2014 Archive
  • Professional Development
    • Desperate Times Call for Mark-Making Magic
    • Roto What? Get the Scoop on Rotoscope
  • Blog
  • Standards Based Grading
    • Home Archive-Sept-December 2013
  • Syllabus
  • Classes
    • Introduction to Art >
      • Introduction to Art Assignments
      • Art Fundamentals >
        • Art Fundamentals Assignments >
          • Unit One: Line
          • Unit Two: Positive and Negative Space
          • Unit Three: Color
          • Unit Four: 3 Dimensional Design-Creature Feature
          • AF- Color and Its Meaning
          • Unit Five: Digital Self-Portrait
          • Sumopaint Digital Self Portrait Assignment
          • Unit Six: Clay Vessel
          • Unit Seven: Cartooning
          • Unit Eight: Reduction Printmaking
          • Art Fundamentals Exam Details
    • Introduction to Digital Media >
      • Introduction to Digital Media Assignments >
        • Introduction to Digital Media CH 5 >
          • Introduction to Digital Media CH 5 Part 2
          • Introduction to Digital Media- Inches to Pixels File Size
          • Introduction to Digital Media CH 6 Presentation
        • Archive Fall 2016 Introduction to Digital Media Assignments
    • Animation-Experimental Video >
      • Animation-Exp Video Assignments
    • Graphic Design >
      • Graphic Design Assignments
      • Archive Fall 2015-Graphic Design Assignments >
        • Graphic Design Assignments-Archive 2014
    • Digital Photography 1 >
      • Portrait Research
      • Portrait of A Place Boot Camp
      • Digital Photography 1 Assignments >
        • Archive Digital Photography 1 Assignments
    • Digital Photography 2 >
      • Digital Photography 2 Assignments >
        • Modern Masters Research
        • Digital Photography 2 Light Painters
        • Now You See Me Now You Don't
    • Digital Illustration
    • Drawing 1 >
      • Drawing 1 Assignments >
        • Drawing 1 Assignments Archive Fall 16/17
        • 1st Semester 2015-16-Drawing 1 Assignments
    • Painting 1 >
      • Painting 1 Assignments
    • Drawing 2 / Painting 2 >
      • Drawing 2-Painting 2 Assignments
      • Drawing 2/ Painting 2 Alt Media Fiber Arts
      • Drawing 2/ Painting 2 Alt Media Encaustic
      • Drawing 2/ Painting 2 Collage
      • Drawing 2/ Painting 2 Alt Media Alternative Mark-Making-Invented Tool
      • Drawing 2-Painting 2-Alt Media-Printmaking
      • Archive 2015-16 Drawing 2/ Painting 2 Assignments >
        • Drawing 2/ Painting 2 Assignments 2014
    • Sculpture 1 >
      • Sculpture 1 Assignments >
        • Clay Bust Sculpting Videos
        • Wheel Throwing
    • Sculpture 2 >
      • Sculpture 2 Assignments
    • AP Studio Art >
      • AP Studio Art Assignments >
        • AP Studio Art Assignments First Semester 2016
        • AP Art Alternative Media
    • Art History >
      • Art History Assignments
    • AP Art History >
      • Art History Assignments Archive 15/16
      • The 250 >
        • CA1: Global Prehistory
        • CA2: Ancient Mediterranean
        • CA3: Early Europe and Colonial Americas
        • CA4: Later Europe and Americas
        • CA5: Indigenous Americas
        • CA6: Africa
        • CA7: West and Central Asia
        • CA8: South, East, and Southeast Asia
        • CA9: The Pacific
        • CA10: Global Contemporary
      • AP Art History Exam
  • Art Club
    • Art Club Archive 2019-20
    • Art Club Archive 2016-17
    • Archive 2016 Art Club >
      • Home-Archive Term 5 2017
      • Art Club Day of the Dead
      • Art Club Archive of 2014-15
      • Art Club archive 2013-14
  • Travel to Italy
  • Wikis
    • Digital Photography Wiki Home
  • College & Career
    • Art College and Career Info
    • Pre College and Summer Art Camp
    • Scholarships
  • Inspirations
  • Advocacy
  • Teacher Resources
  • Wiki-Composition and Focus
  • Virtual and Online Learning Resources
  • A Day in Your Life: Quarantine Realities
Picture
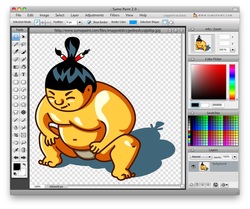
Go to the website called Sumopaint and experiment with the tools there until you are comfortable with drawing and painting from scratch. 

Try the following:

  1. Change the brush you are using. Try the paintbrush, ink tool and the pencil.  See how each differs.
  2. Change the size of the brush.  Change the type of brush with each tool. 
  3. Choose different colors using the picker, the mixer and the swatches.
  4. Experiment with drawing shapes and try to change the color of the shapes.
  5. Use the selection tools (magic wand selects by color, rectangular selects in rectangles and lasso is free draw selection.) to select parts of your image to then colorize or adjust.
  6. Add a layer to your painting and change its opacity.
  7. Bring in a photo that you already have on your computer and try adding a layer and drawing on top of it.  Keep the layer you're drawing and painting on somewhat transparent so you can still see the photo to guide you.
  8. Click on the photo layer and go to the Adjustments menu and try adjusting the color balance, levels and curves of the color in the photo.  See how this affects the photograph.
  9. Try different painting techniques with the photo in place.
  10. Try the remaining tools and see what they do. 
  11. Save your experimental image calling it lastname-section-sketch.jpg, so if I was drawing it would be bjork-B4-sketch.jpg.  Make sure you save it as a jpg not a sumo paint file.  Save this to your Art Fundamentals folder on your laptop directory. 
  12. Email your sketch jpg to Mr. Lamp with your section number and name Sketch as the subject with the image attached or to Mrs. Bjork with B4 Sketch as the subject and the image attached. 

DUE BY THE END OF NEXT CLASS

Research the master artist you are considering.  Here is a great website you might use to do your research:  http://www.wikipaintings.org/

Now do the following:
  1. Write a brief proposal on the ning as a blog post response:  Mrs. Bjork's here , Mr. Lamp's here
  2. Explain in your post who the artist is.
  3. Explain What their style of working is called (impressionism, expressionism, cubism etc). 
  4. Explain Why you want to work in that artist’s style. 
  5. Explain How the artist creates portraits.
  6. Explain What aspects of the artist you will try to imitate. 
  7. Post an image of a portrait or other image that shows  your artist's style with your blog post.
  8. Click here to add your name to the list on Google Docs.  Make sure you put your name in the correct column.
  9. Google Doc Artist Spread Sheet

REMEMBER ONLY ONE PERSON PER ARTIST ON THE LIST, SO IF YOURS IS CHOSEN YOU HAVE TO PICK SOMEONE ELSE, UNLESS YOUR ARTIST'S NAME APPEARS TWICE.
DUE BY THE END OF NEXT CLASS

Powered by Create your own unique website with customizable templates.